|
 1
2
3
4
5
6
7
1
2
3
4
5
6
7

48) Click "Solution Method for Built-in Matrix >>" option. (See fig 3.6)
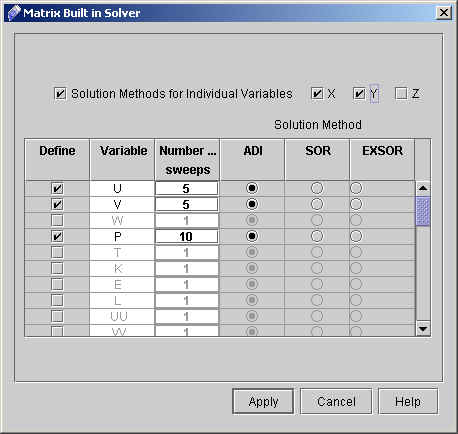
Fig - 3.6: Dialog box for Matrix Solver
- We will have matrix sweeps only in X and Y directions, so check the Matrix Sweeps in Directions: labeled checkbox and uncheck Z.
- Check the checkbox for U, V, P and enter 5, 5, 10 as Number of Sweeps respectively. Leave Alternating Direction Implicit (ADI) method selected, as shown in Fig 3.6
- Click "Apply".
- Now Click "Close" to close the Advanced Output Control Option window.
49) Manually add the following command in the commands file:
"INTEgration for profile by HYBRid profile"
50) GoTo "Output Options" and click on "Advanced". Choose "Output File Options" and choose 80 column under format options. Select the variables U , V , P and MU as shown in Fig 3.7
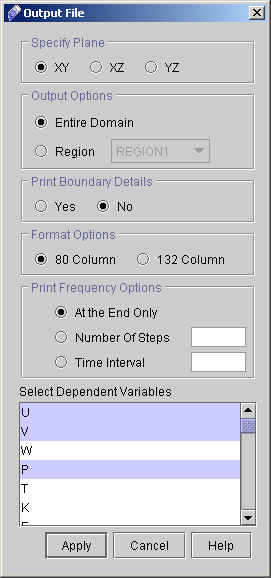
Fig - 3.7: Screen for OUTPUT FILE OPTIONS
51) Click "Next >" to go to Runtime Control dialog window. (see Fig 3.8)
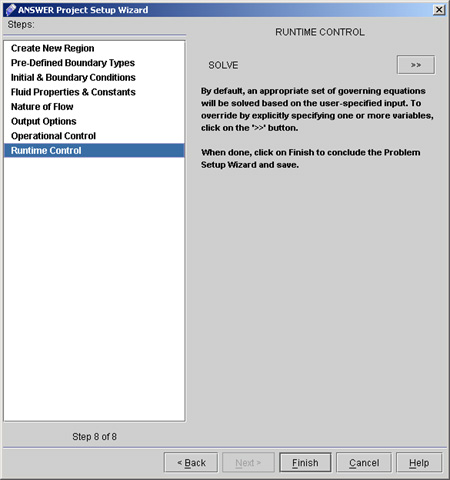
Fig - 3.8: Runtime Control dialog window
52) Click "Solve >>" and dialog box appears see fig 3.9.
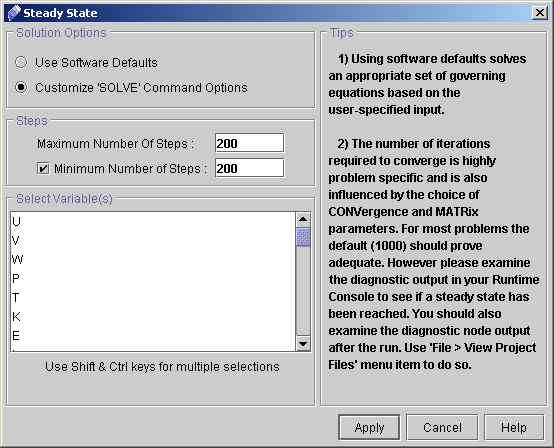
Fig - 3.9: Steady State dialog box
Specify the values as follows
- Select Customize "SOLVE" Command Options.
- Specify Maximum and minimum number of steps as 200 both, for fixed number of steps.
- Click "Apply".
53) Click "Finish" and a message window appears as shown in fig 4.0. Click "Yes" to save the project.
Fig 4.0 Answer Message window
This concludes the setup of the problem. If it is not already, make the Commands File viewable. It should look like:
Fig - 4.1: Command file.
54) Go to Menu option Run >> Run Project (fig 4.2)

Fig - 4.2: Run Menu
It will start a Runtime console window as shown in fig 4.3
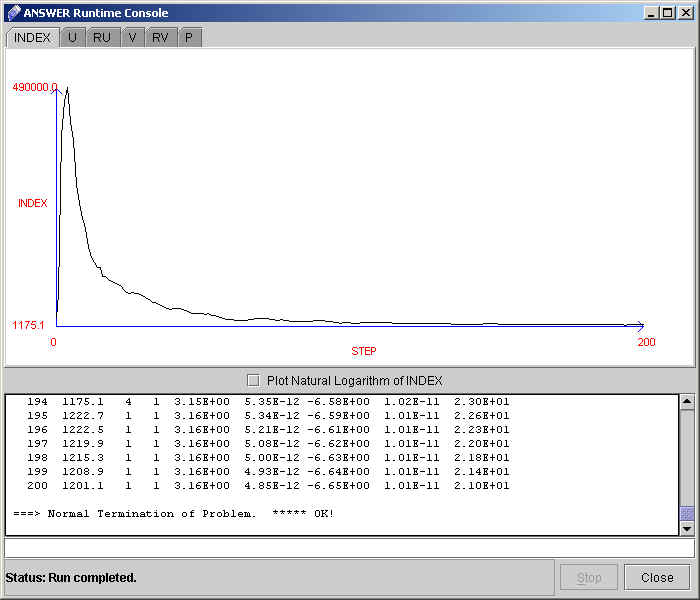
Fig - 4.3: Runtime Console.
Please note that a Stop button is provided in case it is a long run and the solution tends to diverge. Taking a look at the solution graph, one can easily see the trend of the index with increasing steps.
1
2
3
4
5
6
7
# Back to CFDStudio/ANSWER Tutorials Page
Related Links:
# ANSWER Applications
# ANSWER Examples
# ANSWER Express
# ANSWER Publications
# ANSWER Users
# ANSWER Price List
# Request CFDStudio/ANSWER Demo
# CFDStudio/ANSWER Tutorials
# ANSWER Manual
|