|
 1
2
3
4
5
6
7
1
2
3
4
5
6
7

52) Go to Limiting Values for Field
Variables and activate K and E by checking the corresponding checkboxes, then enter the values as shown in Fig.4.0. Click Apply.
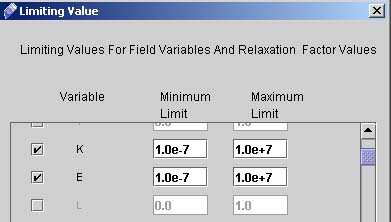
Fig - 4.0: Dialog box for Limiting values.
53) click "Solution Method for Built-in Matrix". Screen will be like as shown in fig 4.1
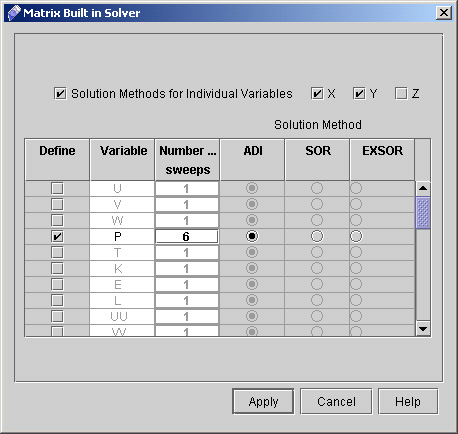
Fig - 4.1: Dialog box for Matrix Solver.
- We will have matrix sweeps only in X and Y directions, so check Solution Methods for Individual Variables. Keep X, Y as Checked and Z as unchecked.
- Check the checkbox for P, enter 6 as Number of Sweeps, leave Alternating Direction Implicit (ADI) method selected, as shown in Fig.4.1
- Click "Apply".
54) Now click "Relaxation factor"
on Advanced Output Control Option window.
- We would like to have Relaxation Factors of 0.3 for U, V, K and E; and 0.6 for P.. By default the relaxation factor for all active variables is 0.5. The only exception is P (pressure) and that of P is 1.0. Hence we will change the relaxation factor of P, U, V, K and E as shown in figure 4.2.
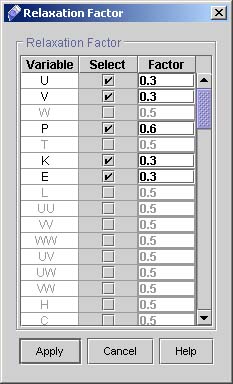
fig - 4.2: Dialog Box for relaxation Factor
- Click "Apply"
55) Click "Close" on Advanced Output Control Option window to terminate the window.
56) Click "Next >" to go to
Runtime Control dialog window. (See Fig 4.3)
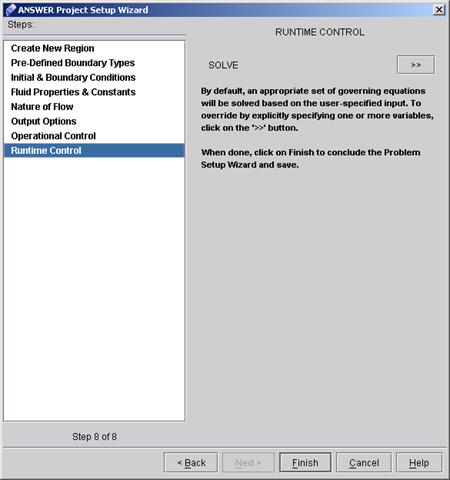
Fig - 4.3: Runtime Control dialog window
57) Click "Solve >>" and dialog box appears as seen in Fig 4.4.

Fig - 4.4: Steady State dialog box
Specify the values as follows
- Select Customize "SOLVE" Command Options.
- Specify Maximum and minimum number of steps as 1500 both, for fixed number of steps.
- Click "Apply".
58) Click "Finish" and a message window appears as shown in fig 4.5. Click "Yes" to save the project.

Fig 4.5 Answer Message window
This concludes the setup of the problem. If it is not already, make the Commands File viewable. It should look like:
Fig - 4.6: Command file.
1
2
3
4
5
6
7
# Back to CFDStudio/ANSWER Tutorials Page
Related Links:
# ANSWER Applications
# ANSWER Examples
# ANSWER Express
# ANSWER Publications
# ANSWER Users
# ANSWER Price List
# Request CFDStudio/ANSWER Demo
# CFDStudio/ANSWER Tutorials
# ANSWER Manual
|