|
 1
2
3
4
5
1
2
3
4
5

38) Go to "CONVERGENCE CRITERIA >>". We will use the following variables for convergence monitoring;
-
- Select U as the convergence variable.
- Check use as reference variable checkbox.
- Check Global residual.
- Enter the value 1.0E-07 as epsilon. (see fig 2.9)
- Enter 10 for maximum number of inner iterations.
- Click "Apply".
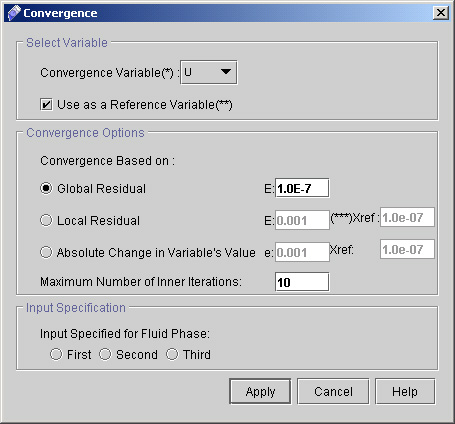
Fig - 2.9: Convergence dialog window
-
- Select V as the convergence variable.
- Uncheck use as reference variable checkbox.
- Check Global residual.
- Enter the value 1.0E-07 as epsilon.
- Enter 10 for maximum number of inner iterations.
- Click "Apply".
- Now Select W as convergence variable and everything will remain same as for V. Click "Apply".
- Select P as convergence variable. Change only Maximum number of iteration to 50 and Click "Apply".
- Select K as the convergence variable. Change only the value of epsilon to 1.0E-06 and Maximum number of iteration to 10 and other things will remain same as for V. Click "Apply".
- Select E as the convergence variable. Change only the value of epsilon to 1.0E-05 and Maximum number of iteration to 10 and other things will remain same as forV. Click "Apply".
39) Now click "Advanced". A dialog window appears. ( See Fig 3.0)
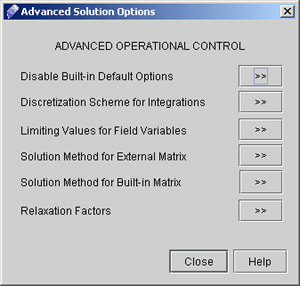
Fig. 3.0 Window for Advance Operational Control
40)Go to "Relaxation Factors >>". A dialog appears (see fig 3.1)
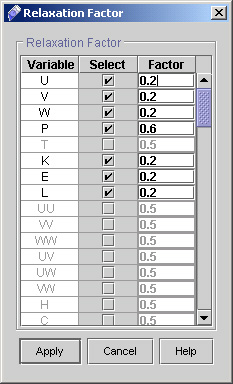
Fig 3.1 Dialog window for Relaxation Factor
- Choose relaxation factor for U, V, W, P, K, E, L and MU as 0.2, 0.2, 0.2, 0.6, 0.2, 0.2 and 0.2 respectively.
- Click "Apply".
41) Close the Advanced Operational Control dialog window by clicking "Close".
42) Click "Next >" to go to Runtime Control dialog window. (see Fig 3.2)
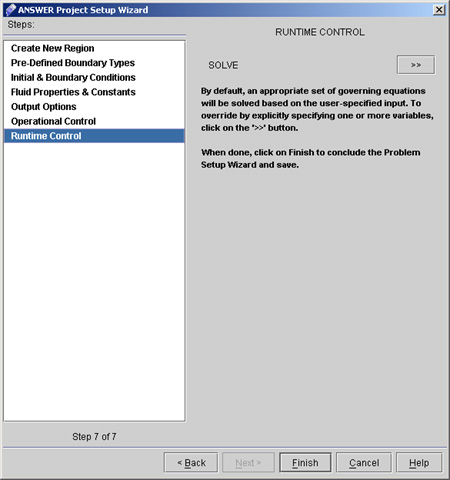
Fig 3.2 Runtime Control Dialog Window
43) Click "Solve >>" and dialog box appears as shown in fig 3.3
- Choose Customize "SOLVE" Command Options under solution Options.
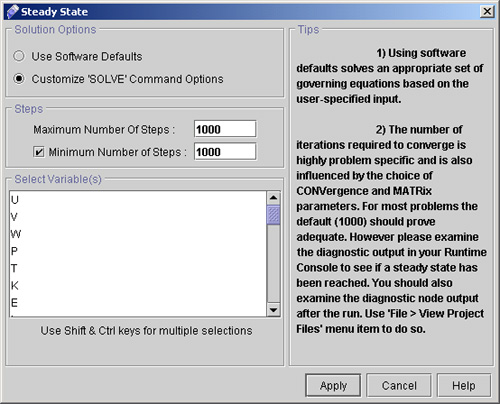
Fig 3.3 Steady State dialog box
- Specify Maximum and Minimum number of steps as 1000 both, for fixed number of steps.
- Click "Apply".
44) Click "Finish" and message window will appear as shown in fig 3.4a.
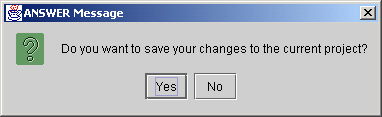
Fig - 3.4a: Message Window
We are done with the setup of this problem and now ready to run the project. Command file looks like this:
Fig 3.4b Commands File Dialog after problem setup is complete
1
2
3
4
5
# Back to CFDStudio/ANSWER Tutorials Page
Related Links:
# ANSWER Applications
# ANSWER Examples
# ANSWER Express
# ANSWER Publications
# ANSWER Users
# ANSWER Price List
# Request CFDStudio/ANSWER Demo
# CFDStudio/ANSWER Tutorials
# ANSWER Manual
|