
 |
ACRi -- Analytic & Computational Research, nc.
|
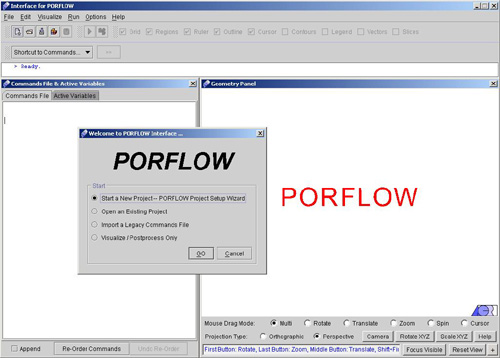
THREE-DIMENSIONAL CONTAMINANT TRANSPORT Before You Start: This Tutorial Problem Requires PORFLOW™. The users are encouraged to walk through this tutorial and reproduce it on their own while following, rather than just browsing through it. In the present tutorial we will simulate the transport of a contaminant in a three-dimensional domain. A horizontal source area on the upper surface of the computational domain continuously releases a contaminant into the aquifer which is initially free of the contaminant. The flow within the aquifer is unidirectional and parallel to the longitudinal (x) axis. Advective transport moves the contaminant in the downstream direction, while dispersive movement causes spreading of the contaminant in all directions. The problem is symmetric in the lateral (y) direction therefore only half of the total domain is simulated. (Codell, R.B., T.K. Key and G. Whelan, 1982. A Collection of Mathematical Models for Dispersion in Surface Water and Groundwater, NUREG-0868, Division of Engineering, Office of/ Nuclear Reactor Regulation, Washington, D.C.) In this tutorial, we will be setting up a 3D structured grid and solving the problem using PORFLOW™ 1) Run the Interface as PORFLOW™ as the Application. The opening screen of PORFLOW™ looks like as in Fig.1.1.
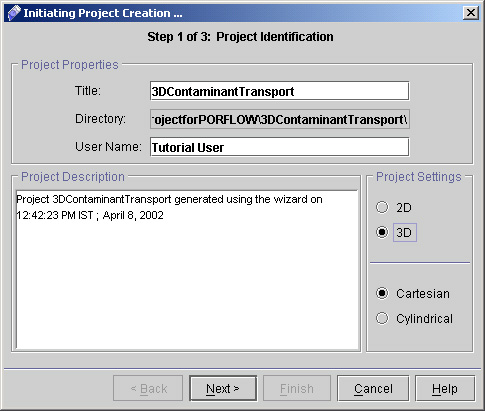
2) Click "Start a New Project- PORFLOW Project Setup Wizard" >> Go, to start the project. A new dialog window appears to specify the project identification having options like project title, User name and the options for the grid type. Enter the required information as shown in Fig. 1.2. Note that the "User Name" section is filled out automatically with your username as is registered on your computer.
3) In the Title field, type "3DContaminantTransport". This is a very important step. The title is used as the folder and file names for all project files. For instance,
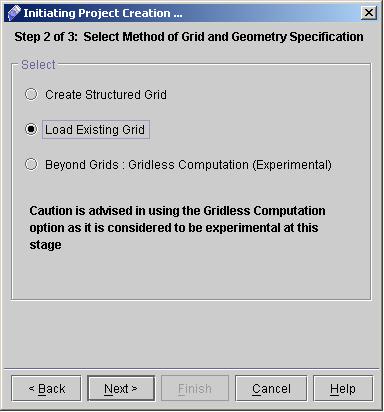
4) In the User Name field, type your name and For specifying the grid type, select either 2D or 3D based upon your Project requirements. Here in this case we will choose 3D Cartesian. Project Description area provide you the current details of Project including Project Title, Date and time. 5) For the next step, click Next > to reach the Grid and Geometry Specification page (as shown in Fig 1.3)
6) Click on Load Existing Grid and use the link to download the Grid file Contaminant-Transport.zip. After downloading, Unzip and Save it in local Drive. Click "Next >"
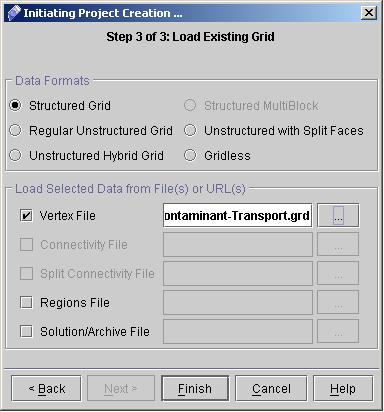
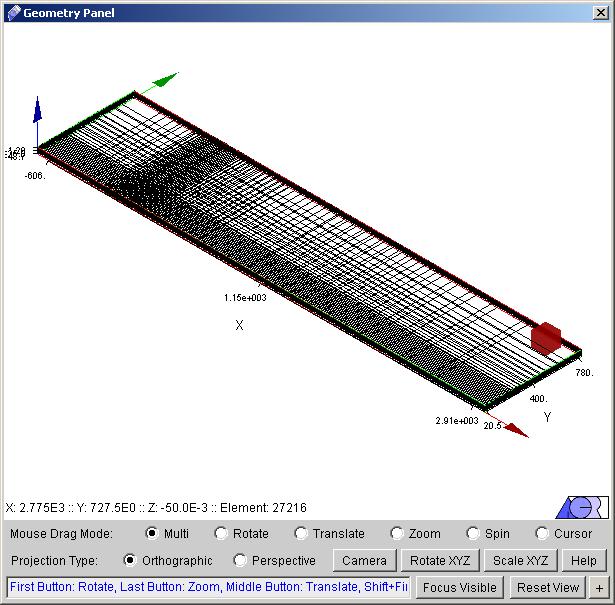
7) Click on Structured Grid and check in Vertex File box and click on browse button and select the file .
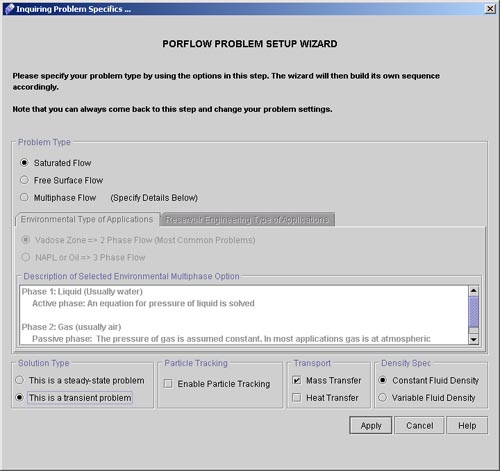
8) Defined geometry will be created in the geometry panel and a dialog window will appear as "PORFLOW PROBLEM SETUP WIZARD". (See Fig.1.5 and 1.6)
9) For the problem in hand we will choose different options from "PORFLOW Problem Setup Wizard" dialog (see Fig 1.6).
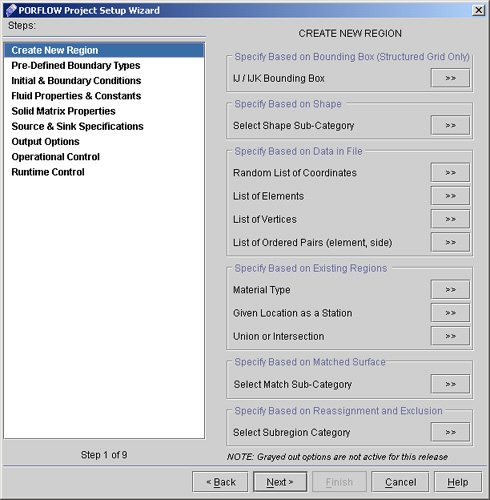
10) A "PORFLOW Project Setup Wizard" dialog window appears as shown in fig 1.7. This will guide us to set up the problem step by step.
# Back to CFDStudio/PORFLOW Tutorials Page
Related Links:
# PORFLOW Applications |